This blog was offered as a static website hosted with a classic (or call it old fashioned) hosting provider at the time I began writing this blog post.
Recently I got to know Netlify, which looks like it could simplify the whole publishing workflow related to static websites. I played around for some time and decided to migrate my blog. The necessary steps are documented here.
Please note that I’m simply a user migrating to Netlify and not related to Netlify in any other way. I do not benefit in any way from writing this blog post. I don’t want to convince you to use Netlify. But if you come to the conclusion that you want to migrate, feel free to consider my experiences documented here.
Starting Point
First of all let’s have a short look at the situation before the migration. The tech stack for my personal blog consisted of Jekyll as static site generator, GitHub for hosting the Git repository with all source files, Travis CI for builds and deployments, and a small website hosting package offered by Ionos.
I liked this setup because the build and deployment process and the necessary tooling are similar to what we do in Software Engineering.
Whenever there was a push to the master branch, the build process was automatically triggered and took care of generating the static website representing my blog. Once finished, the result was copied to the webspace and the new version of the blog was available.
Considerations and Motivation
There was no urgent reason to change something in the build and deployment process nor in the hosting solution. Nevertheless, reading about Netlify made me curious what it is and what it would offer.
What I found out is that it could take over the parts which were previously solved by Travis CI and Ionos in my setup. In other words it’s a solution for running static website builds which can be triggered directly from the version control system resp. the code hosting platform - which is GitHub in my case.
After such a build finishes, the result is automatically deployed within Netlify, i.e. it also takes over the hosting of the static website.
The relevant features for me discovered so far are:
- Netlify integrates a Content Delivery Network (CDN) and completely takes over management, invalidation etc. I did not use one yet, but this could be a performance booster. Such a CDN is not really necessary for a small hobby blog like mine, but if it’s available and easy to use, I’ll take it.
- Netlify keeps track of the deploy history and offers the possibility to roll back to a previous version easily.
- Netlify offers deploy previews. When a pull request is created, Netlify builds the source branch and deploys the result to a separate environment for preview purposes.
But to be honest - besides cool features, the price was a relevant criteria for the decision to migrate to Netlify. I’m willing to invest time and effort in the migration itself, but I don’t want to increase ongoing costs for my blog.
And this is the good news. For small static websites like my blog with low traffic and no other contributors, the offering of Netlify is for free in the starter plan. If you want to have a look at the pricing tiers, please check the documentation on the Netlify website.
Migration Plan
With the decision made, it’s time to plan the migration. The necessary steps I discovered are:
- Create a Netlify account.
- Take care of SEO pitfalls.
- Create the site on Netlify and let it execute the initial publish.
- Configure the existing domain and a certificate for transport level security.
- Do some tests to verify that everything works as desired.
- Remove previously used infrastructure which is not necessary any more.
I’ll explain the tasks of all steps one after another.
Create Netlify Account
This step is not really worth describing it. Just go to the signup page of Netlify. There are several possibilities how you can create an account. I registered with my GitHub account.
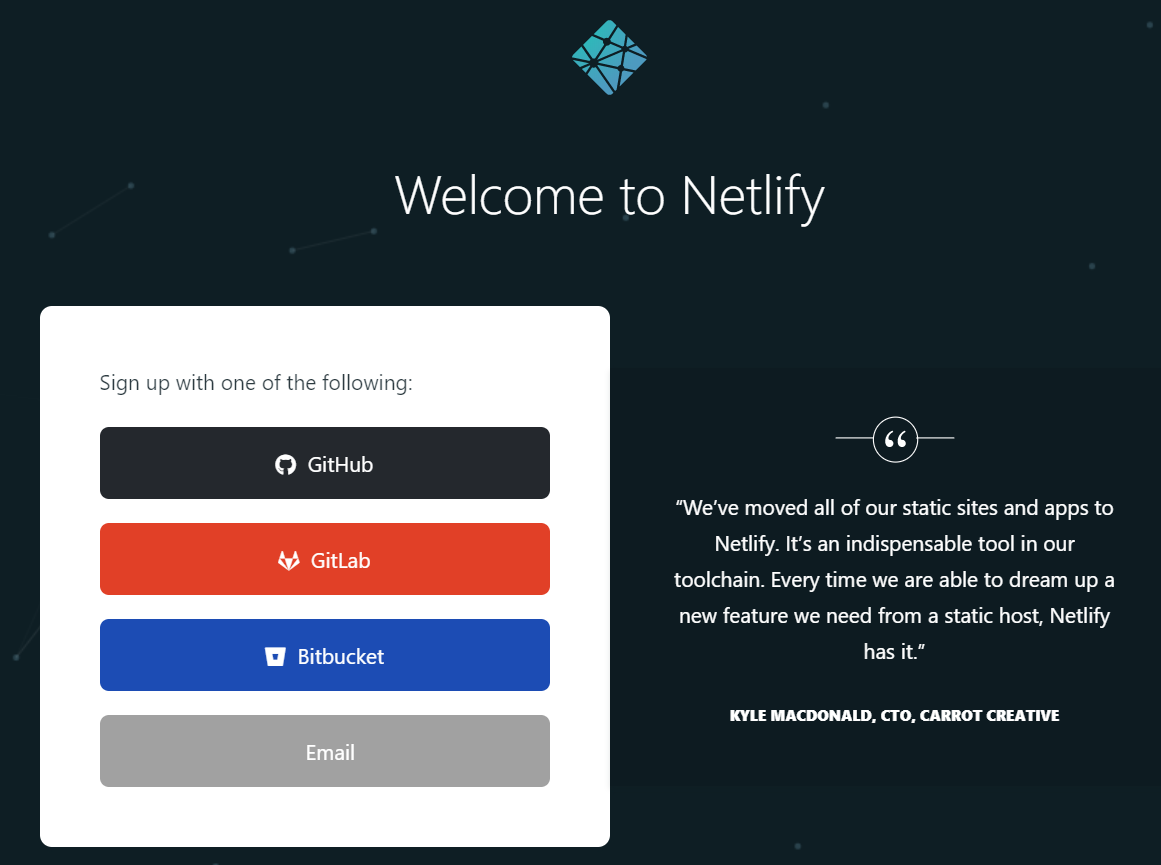
You will then receive an email with a confirmation link. Simply click this link and your account will be ready to use.
Take Care of SEO Pitfalls
When I had a more detailed look at the features offered by Netlify, some Search Engine Optimization (SEO) considerations came to my mind - especially the topic of duplicate content. Search engines penalize if multiple URLs deliver the same content if no additional measures are taken. This influences the ranking for the search in a negative way. If you want to get familiar with the details I recommend a short Google research on this topic.
The duplicate content topic could be a problem when we think about the features offered by Netlify. Let’s have a closer look at the relevant ones and find a solution.
- Netlify makes a site available using a Netlify subdomain as well as your custom domain, if you configure one. The consequence is that my blog is available on https://baitando.netlify.com as well as on https://baitando.de. Since the content is the same, we will run into the duplicate content issue. This is of course also an issue for the migration, since the old hosting remains active during the setup phase on Netlify.
- Netlify can create deploy previews for pull requests. This is a useful feature, which is active by default. When a pull request is opened, Netlify generates the source branch and deploys the result to a separate environment available under another Netlify subdomain. This leads to additional copies of the site. Since most of the content is the same (except the changes done in those branches), we will run into the duplicate content issue again.
The second topic was asked at least twice in the Netlify community forum as you can see in this post from May 2019 and this post from August 2019.
One of the Netlify support team members pointed out, that Netlify automatically takes care of preventing deploy previews from being indexed by sending the X-Robots-Tag: noindex header.
This seems not to be documented yet.
At least I did not find anything else than the two forum posts in my research.
I tried it out with a deploy preview and I can confirm that the header is sent in the response of a deploy preview. As described in the Google documentation, this should have the desired effect of not crawling those pages.
Nevertheless I recommend to take another measure with setting the canonical link in the head section of each page.
This canonical tag tells the crawler where the original content is located.
For further details on this topic please have a look e.g. at the documentation provided by Google.
Setting this link is in general a good idea. Besides that I want to make sure that SEO related topics do not depend on an undocumented feature of Netlify.
<link rel="canonical" href="https://www.baitando.de/2019-10-25-migrate-static-website-to-netlify" />
The snippet above points to the published instance of my blog and is the same on all deployed instances.
A similar link needs to be part of the head section of all pages.
A crawler would then always be pointed to the published page instead of the one belonging to the deploy preview or the one using the Netlify URL.
In my case this tag was already present, i.e. there was nothing to do.
Create Site
Once your account is ready and you log in, you will recognize that a team was automatically created. Such a team seems to be a container for sites. A team consists of members who are able to manage the sites assigned to the team. For my use case this is not relevant since I’m the only one contributing to the blog.
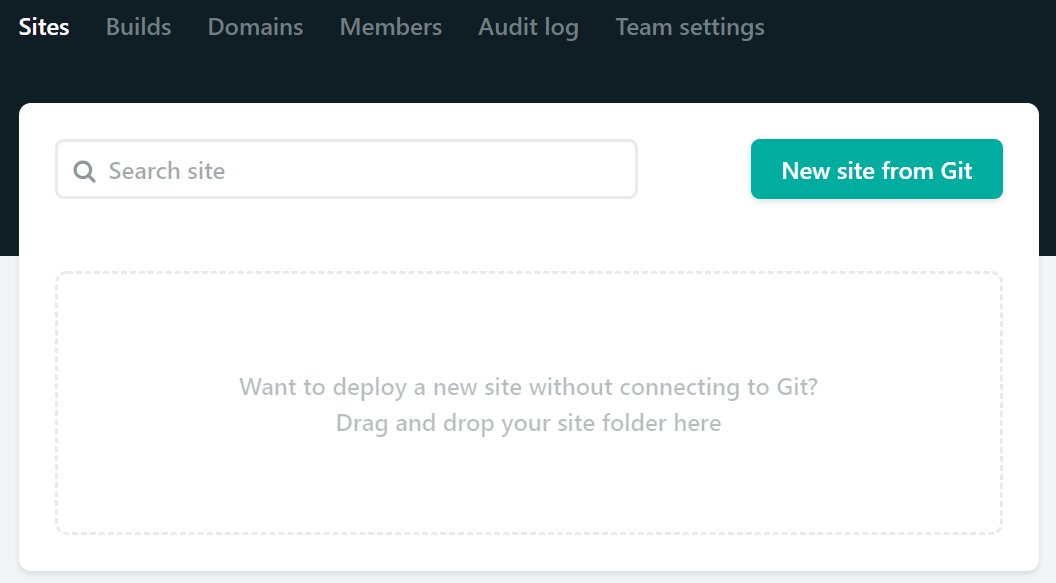
The list of sites is empty. So let’s create one by clicking on the button. Then follow the three step wizard.
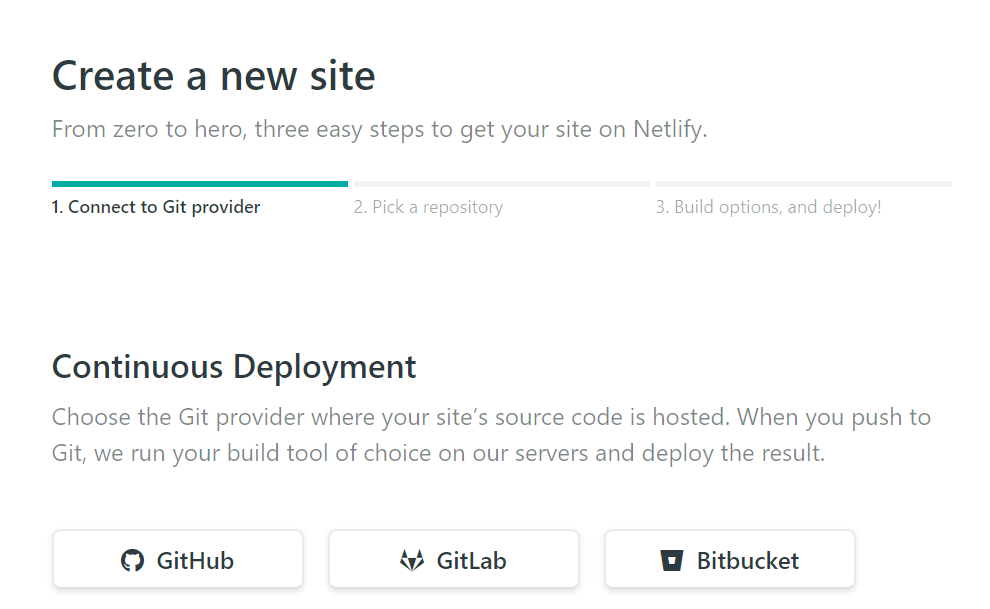
After clicking the button, you have to select the code hosting platform. Netlify supports GitHub, GitLab and Bitbucket. I use GitHub.
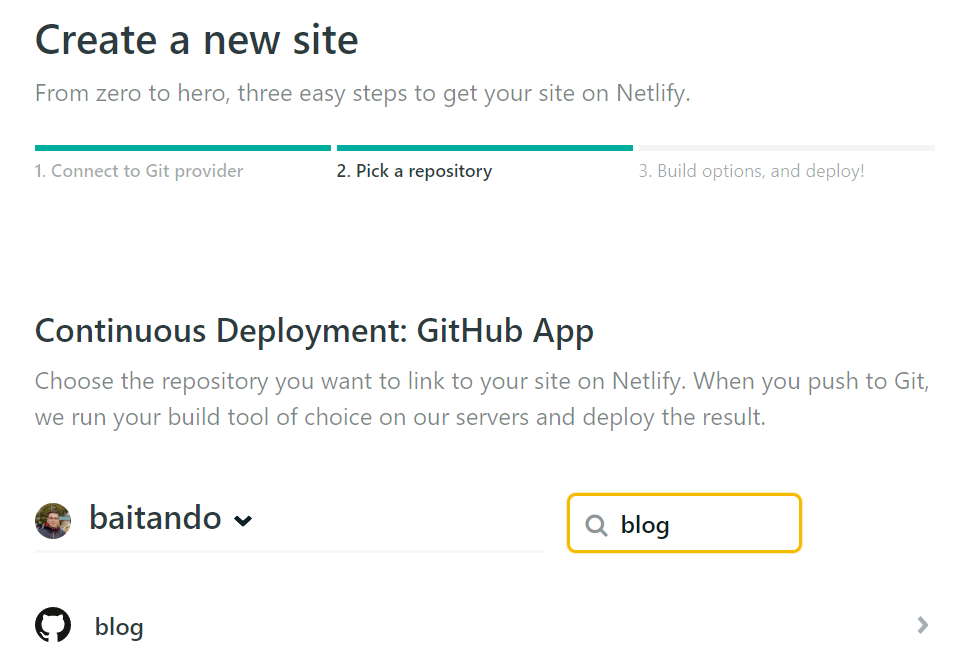
Once you click on one of the options, you have to grant access to your account on the selected platform. For details about the requested permissions, you can check the Netlify documentation. Then select the repository containing the source files of the website.
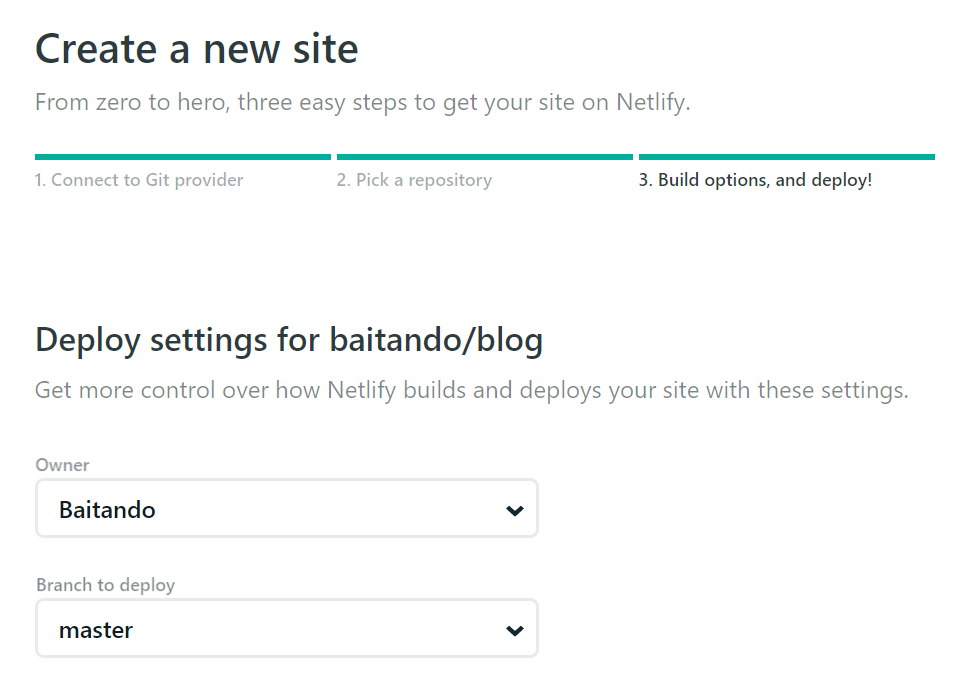
As last step for now we have to do some configuration. The first settings stay on default in my case. The site is by default owned by the automatically created team. Since you have only one team in the starter plan, there is nothing to change for me. I want to publish my blog from the master branch. So this setting remains on the default too.
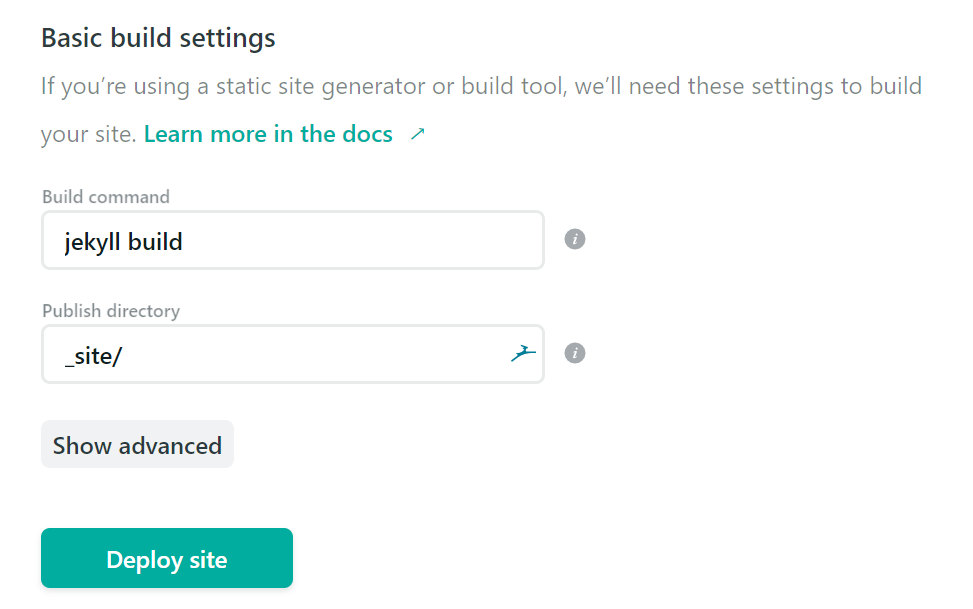
The other settings depend on the static site generator you use. In my case this is Jekyll. The screenshot show the settings required for this one. If you are not sure what to set here, you can check common configurations listed in the Netlify documentation.
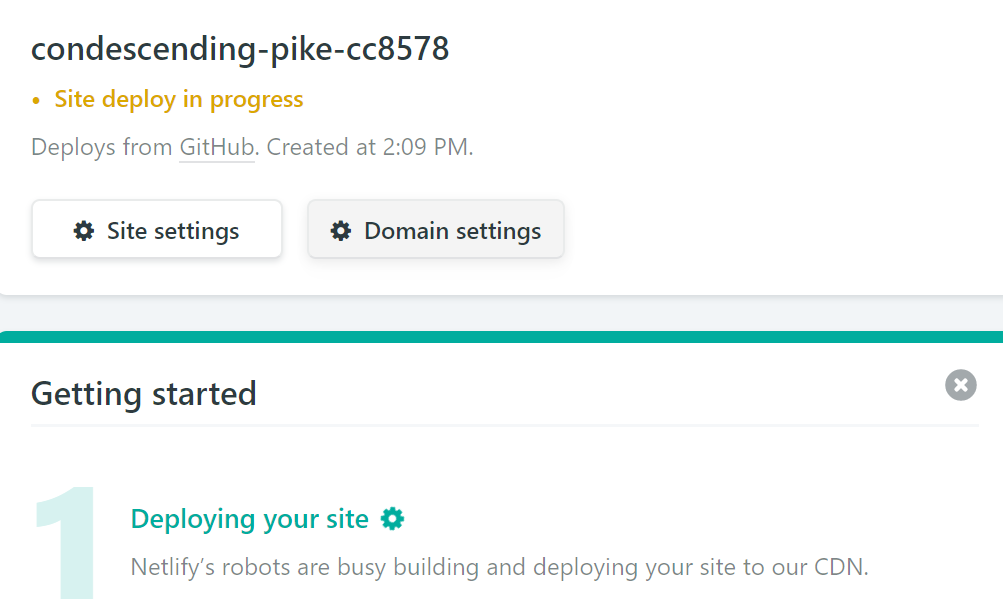
Now we can finish the configuration with a click on the deploy button. This will trigger the first build. If this is successful, your static website will automatically be published on Netlify.
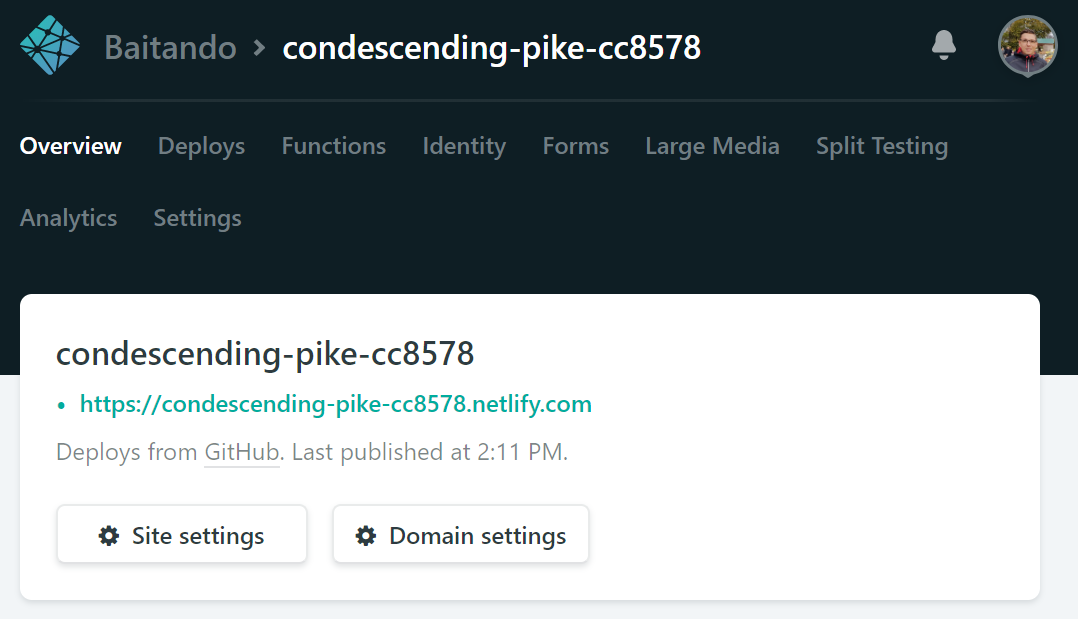
The result will be available on a Netlify subdomain, which is provided on the page once the process finished. You can now check the result by following the link provided there.
Since we already took care of SEO pitfalls, there is no problem in having another URL for your blog. The canonical URL is set and crawlers will therefore know where to find the original post.
As an optional step you can change the name of your site in the site settings section.
In my case I chose the name baitando.
Please keep in mind that changing the site name will also change the Netlify subdomain of your site.
In my case it was automatically changed from condescending-pike-cc8578.netlify.com to baitando.netlify.com.
Domain Configuration
The next step is to switch from the previous hosting provider to Netlify. To achieve this, we have to adjust the DNS entries first. After that we can configure the domain in the domain settings area on Netlify.
There are several ways to handle this. They are also documented in the Netlify documentation.
- If the domain is not registered yet, you can do that with Netlify. In this case Netlify will automatically handle DNS configuration. Since I am migrating an existing website this is obviously no option.
- If you already registered the domain elsewhere, you can switch to the DNS of Netlify. The result is similar to the previous option and makes it possible to e.g. use branch specific subdomains which are added by Netlify on the fly.
- If you already registered the domain elsewhere and you don’t want to use the DNS of Netlify, you can point a separate DNS to Netlify.
I wanted to keep the impact as small as possible. To avoid a migration of blog unrelated DNS settings, I decided to use the third approach.
The configuration of an external DNS is described in the documentation.
If you use already used a subdomain which is not www, the DNS adjustment is pretty simple.
You just have to set the CNAME of the subdomain to your Netlify subdomain and everything should work fine from a DNS point of view.
The subdomain I use is www which leads to the necessity of additional settings.
If you register a www subdomain in Netlify, the Apex domain is automatically added also.
In my case I configured www.baitando.de and baitando.de (the Apex domain) was automatically added.
In addition to the CNAME for the www subdomain I had to configure the DNS for the Apex domain.
Some providers offer the possibility to register ANAME or ALIAS records which are similar to the CNAME but on the Apex level.
Unfortunately Ionos does not offer this.
Therefore I had to point the A record directly to the IP of the Netlify load balancer as suggested in the screenshot below.
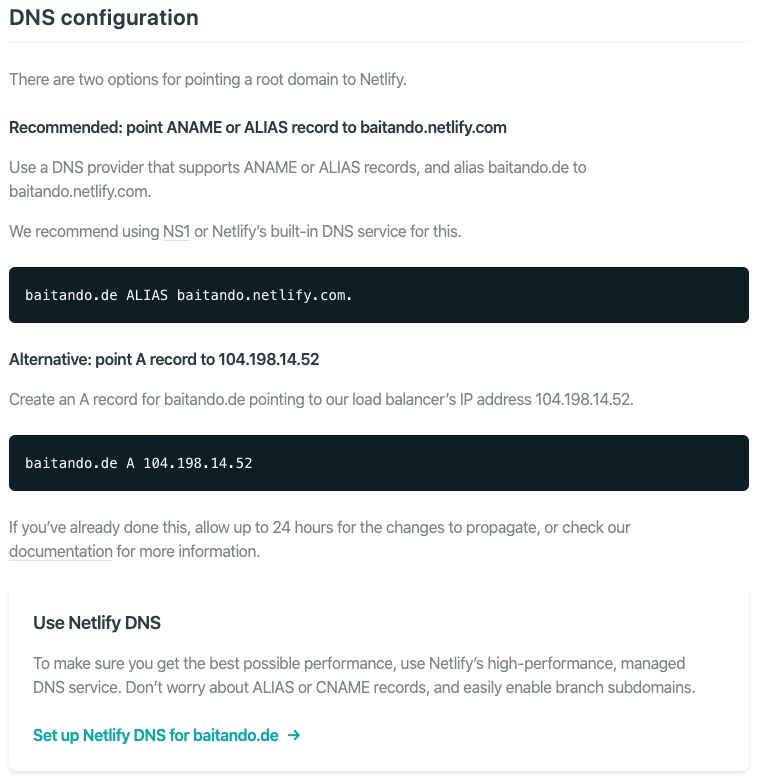
The downside of pointing to a static IP with the A record is, that this contradicts the idea of the CDN which leverages different IPs depending on the region of the request.
Luckily this is no problem in a setup like mine. The primary URL of my blog is https://www.baitando.de. This URL is always the target. All other requests like https://baitando.de should be automatically redirected there. This redirect will be described later in this blog post. The sitemap also points to the primary URL.
In case of a request sent to https://baitando.de, a redirect to https://www.baitando.de occurs.
From this point on, the CDN works.
The A record is therefore not really a problem from a performance point of view.
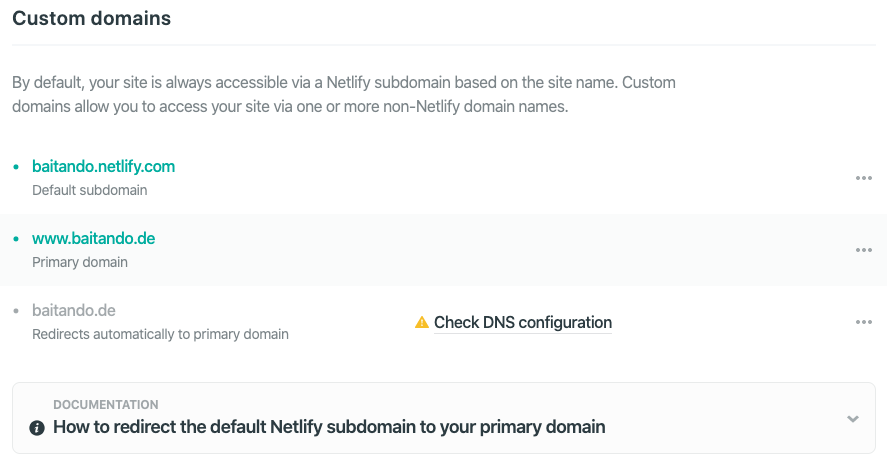
Once the DNS changes are done it could be necessary to wait for some time, because the DNS propagation may take some time. During this time you will see a message similar to the one in the screenshot below.
The next step is to get a certificate for the custom domain. You can configure this in the certificate section by uploading an existing certificate or by requesting one from Let’s Encrypt.
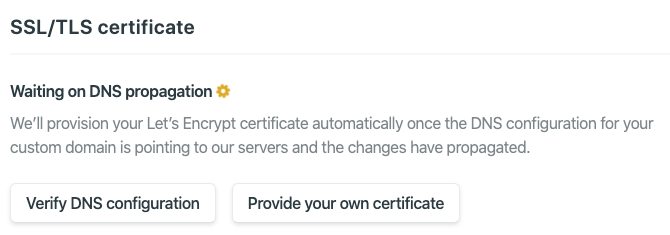
I recommend the latter, which is a great and easy solution to obtain widely trusted certificates for free. The mechanism to get one is integrated in Netlify. After the DNS propagation finished, you can trigger the creation process. If this is not the case, you will see a message similar to the one in the screenshot below.
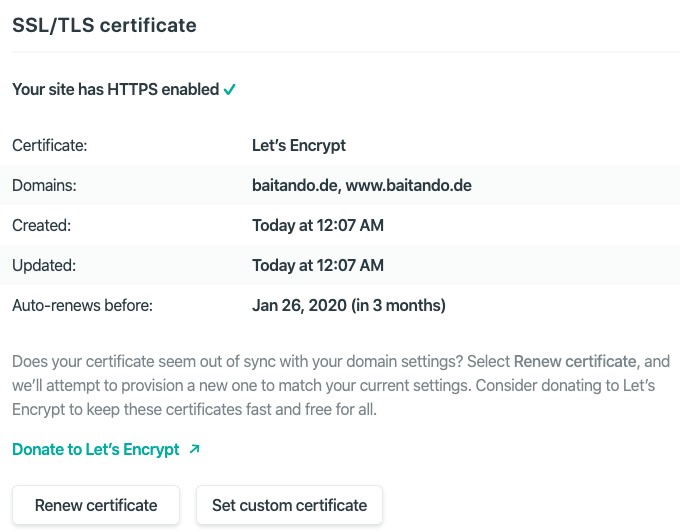
After the certificate was issued successfully, Netlify configures it for your domain. This will look similar to the screenshot below.
You may have noticed, that a hint similar to the one below is shown in the configuration section. It says that you can add a redirect rule, which redirects from your Netlify subdomain to your custom domain. One benefit of this is related to SEO, because you avoid that a crawler scans both - your custom domain as well as the Netlify subdomain.
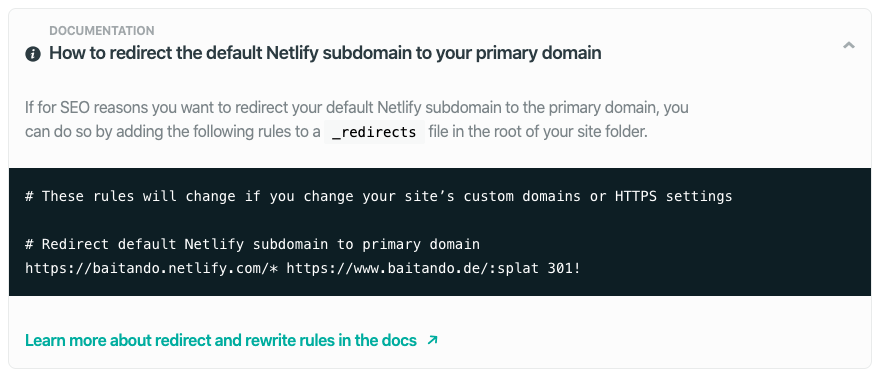
In my case this would be no problem, because the canonical URL is set as described in the preparation part in the beginning of this post.
Nevertheless I don’t want my published blog to be available on two different URLs.
Therefore I created the file _redirects in the root directory of my repository.
Further details on the Netlify redirect configuration is available in the documentation.
https://baitando.netlify.com/* https://www.baitando.de/:splat 301!
Now this file needs to be included in the generated static website.
Using Jekyll this is achieved with the include setting in _config.yml.
Further Performance Tuning
I recognized that Netlify can do additional optimizations related to minification and lossless image compression. If you want to try out such optimizations you can enable them in the site settings area.
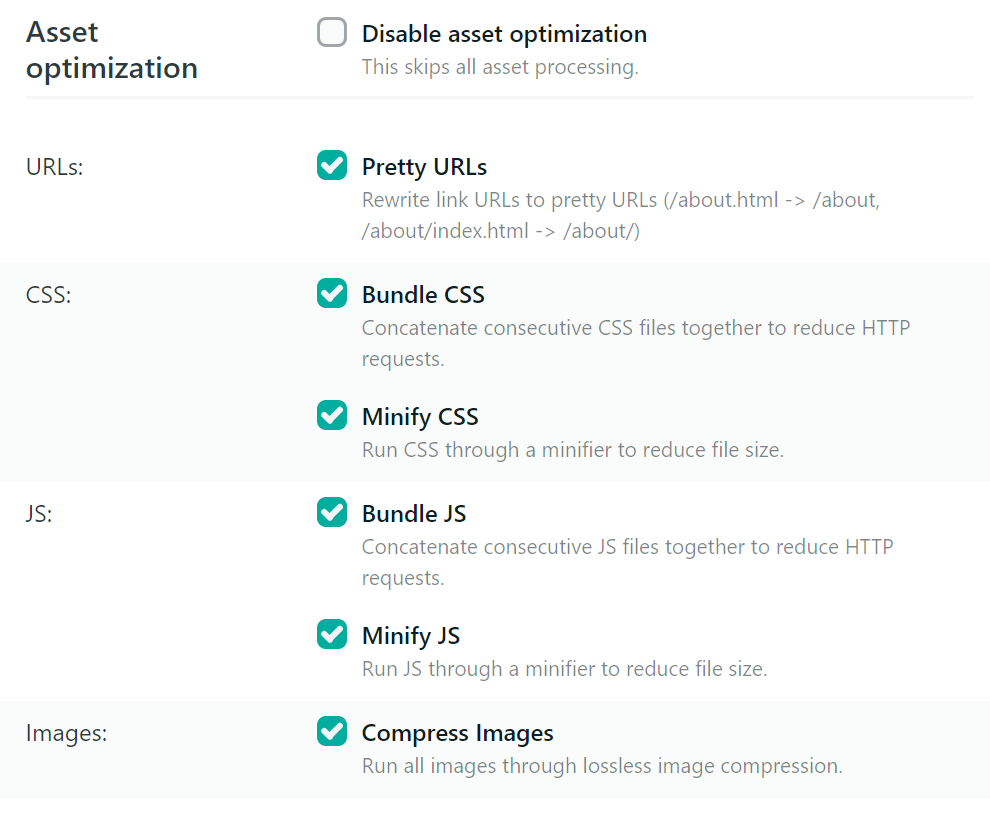
Please keep in mind, that changes in this configuration get effective with the next deployment. To check the results immediately you need to trigger a new deployment manually.
Status Badge
Netlify offers a status badge which shows the current build and deployment status of the website. The markdown snippet for embedding the status badge in a markdown file is provided in the configuration section of the site in Netlify. The area containing the snippet looks similar to the screenshot below.
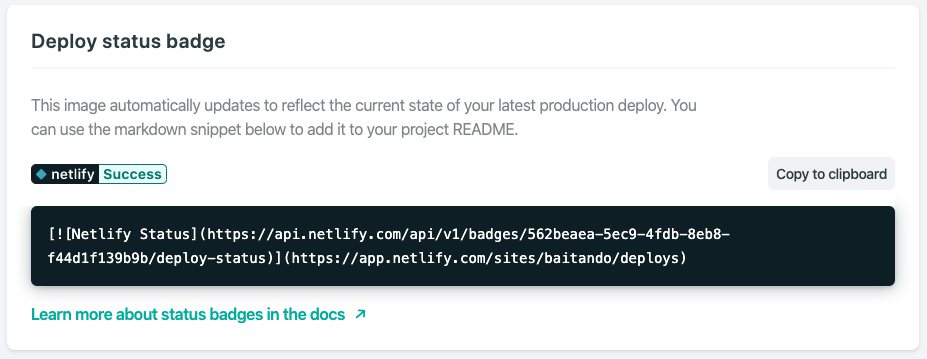
I added this status badge in the README.md file of my blog as you can see on GitHub.
Pull Request Previews
One of the cool features provided by Netlify is the GitHub integration together with previews for pull requests. Whenever a pull request is created, Netlify builds and deploys the sources in this branch and deploys the result to a separate Netlify subdomain.
Additional information is shown directly in the pull request like in the screenshot below, which was taken immediately after the pull request for this blog post was created. Feel free to have a look at the pull request of this blog post directly on GitHub.
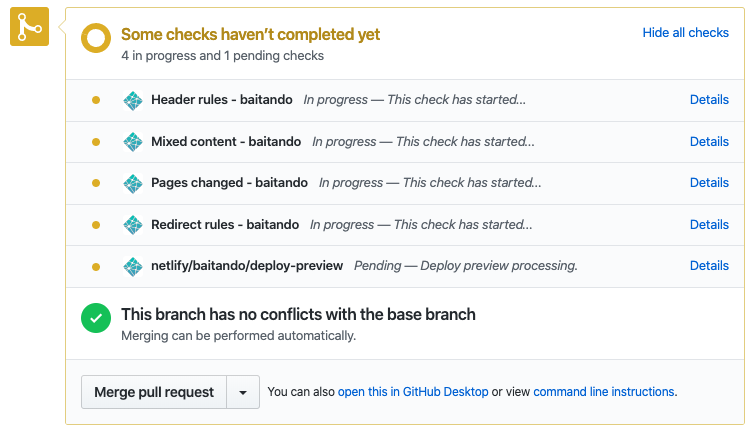
Once Netlify finished processing of this pull request, the box will look like the one below. You will find some information related to build and deployment, which is equivalent to what you see in the Netlify dashboard. If you click on the “Details” link in the row related to the deploy preview, you will be redirected to the Netlify subdomain to which the preview was deployed.
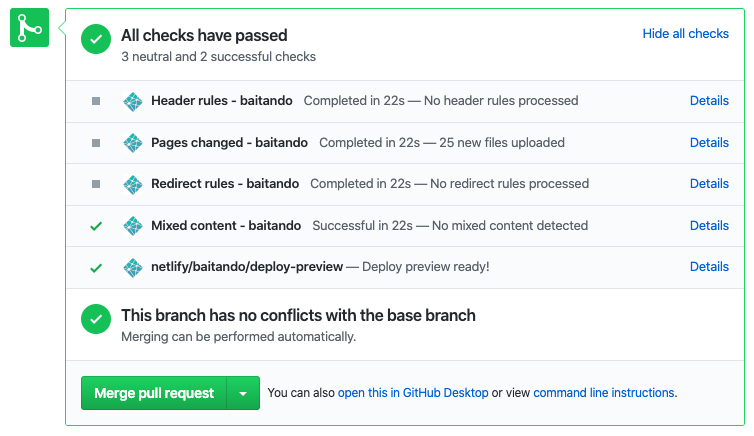
In my case the URL of the base URL of the deploy preview is https://deploy-preview-2–baitando.netlify.com.
According to the documentation the URL foolows the schema https://deploy-preview-<pr-id>--<site-name>.netlify.com.
Don’t worry about SEO and duplicate content.
Like previously described, Netlify sends the x-robots-tag: noindex header for such deploy previews.
As a second measure, we made sure that the canonical link is set as described in the preparation part related to SEO pitfalls.
Performance Improvements
Now let’s check some numbers related to performance. Due to the fact that my blog has not that many visitors, this is not that important. Nevertheless I am a Software Engineer who is happy with good, stable solutions with good performance.
The numbers below are some values from loading one of the blog posts before and after the migration. I simply opened the developer console in the browser and requested the same blog post several times to get a feeling for usual loading times which may vary from one request to another. Then I picked the values of a request with a usual response time and wrote them down. I think this gives at least an indication of how performance changed due to the migration.
First I disabled caching in the developer console of the browser and did some measurements in different scenarios.
| Scenario | Load Time | Transferred | Requests |
|---|---|---|---|
| Old without caching | 1.79 s | 1.3 MB | 33 |
| New without caching without optimization | 1.26 s | 1.2 MB | 32 |
| New without caching with optimization | 1.19 s | 1.2 MB | 25 |
After that I enabled caching in the web console and did some more measurements.
| Scenario | Load Time | Transferred | Requests |
|---|---|---|---|
| Old with caching | 675 ms | 8.6 KB | 33 |
| New with caching without optimization | 634 ms | 5.8 KB | 32 |
| New with caching with optimization | 433 ms | 853 B | 25 |
These values indicate that performance improved a bit. This is what I hoped for, because I did not use a CDN before the migration and now switched to a solution with a CDN. Based on these results it seems like it was at least not the wrong decision to move to Netlify from a performance point of view.
Cleaning Up
Now that the migration itself finished, it is time to clean up. I won’t go into details here, but the things I had to do are listed below.
- Deactivate the repository on Travis.
- Remove the
.travis.ymlanddeploy_rsa.encfiles. - Delete all data on the old webspace.
Conclusion
In this post I described the necessary steps to migrate my blog to Netlify. This should be more or less also valid for any other static website.
The migration was easily doable and the solution itself looks good from my current point of view. I did not regret to migrate and I hope I won’t in the future.
I will gather some more experience with writing my next blog posts. If my current impression is confirmed, I will most likely migrate some other websites I do on a voluntary basis.